Event Viewer
In
both Server 2003 and Server 2008 (which includes the more advanced and
complicated form of Event Viewer), there are Application logs. Because
Exchange is considered an application, your informational or failure
events are located here. This makes Event Viewer an essential part of
your monitoring of Exchange.
There
is software that automatically checks through event logs for
predetermined flags with Exchange. However, you can manually open the
Event Viewer to look for problems, too.
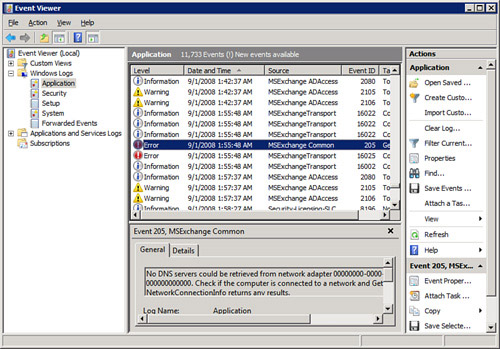
As you can see in Figure 4,
you have Error, Warning, and Informational types of levels that are
reported. The source might come from a variety of different places and
the event IDs can range from the lower numbers into the thousands, so
it is almost impossible to try to keep track of all this. Another
solution that is programmed to keep track of all of those events would
be a better solution, as we will see with MOM and/or SCOM. However,
there are times when there are obvious codes or events that you are
looking for, and you can use the filtering features of Event Viewer to
track these down.
Attach a Task to an Event
Another
feature of the Event Viewer in Server 2008 is the capability to attach
a task to an event. Let’s say you see an error is repeating on your
server. You want to know the next time it happens immediately. So, you
locate the error in the Event Viewer and perform the following:
1. | Select the event to which you wish to attach a task.
|
2. | From the Actions pane, select Attach Task To This Event to begin the Create Basic Task Wizard.
|
3. | The
first screen should have the name of the task already, but you can
modify this. You can also include a description, and then click Next.
|
4. | Because
you are creating this task to occur based off of an actual event, the
Log, Source, and Event ID are already filled in for you (and grayed
out) on the When a Specific Event Is Logged screen. Click Next.
|
5. | On the Action screen, you can choose to perform the following:
- Start a Program.
- Send an E-mail.
- Display a Message.
|
6. | Depending
on the option you select in Step 5, you are able to configure which
program you want, the email you wish to send, or the message you want
displayed on the screen. Select your action and click Next.
|
7. | Input the details of your action and then click Next.
|
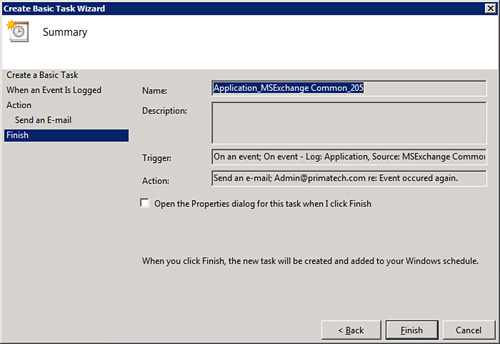
8. | On the Summary screen (shown in Figure 5),
you are shown the name, the trigger (what will kick off the action),
and the action. You can choose the option Open the Properties Dialog
For This Task When I Click Finish in the event you want to make further
adjustments to the task.
|
9. | Click Finish.
|